
We may earn revenue from the products available on this page and participate in affiliate programs. Learn more ›
Any gaming console has its particular quirks. Whether you play on a Sony PlayStation 4, Microsoft Xbox One, Nintendo Switch, or some combination of the three, you can find tricks to improve your video game experience. We’ve collected 9 pieces of advice for each console, from making older PlayStation games work better, to streaming Xbox play to a Windows computer, to boosting the Switch’s battery life. Experienced and new players alike can find tips to level up their gaming.
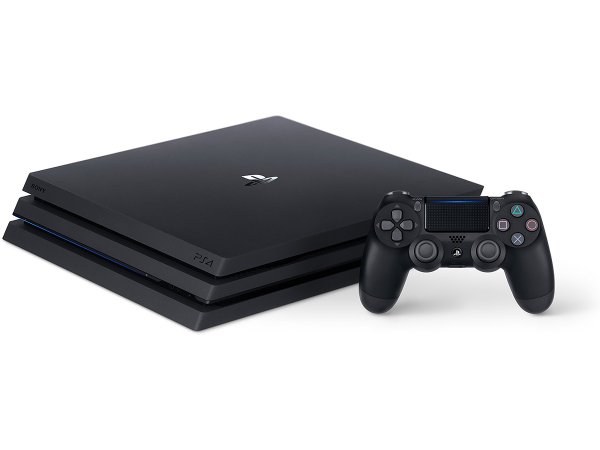
For PlayStation 4
1. Turn your phone into a remote
With the PS4’s standard DualShock controllers, entering text and scrolling through menus can take way too much time. That’s one reason to install Sony’s Second Screen app (for Android and iOS). This program lets you navigate console menus and type out text (like usernames and passwords) from your phone. Some games even give you extra material, such as maps, to view through the app.
2. Listen privately
You may have noticed the headphone jack built into the PS4 DualShock controller. When you plug in your headphones, however, the console doesn’t automatically divert all of the game’s audio. By default, only the in-game chat will pipe through your cans. But if you want to avoid disturbing your housemates, you can tweak the settings to privately listen to everything coming from your console, including sound effects and music. To do so, hold down the PlayStation button until you see a menu appear on screen. Then select Sound/Devices > Output to Headphones and change the option to All Audio.
3. Add custom wallpaper
Sure, the PS4 offers lots of free and paid-for wallpaper themes. But what if you want to make something yourself? To create a custom wallpaper, start by plugging a USB stick into your computer. Make a new folder called “IMAGES” at the top level of the portable drive and drop in some pictures. On the standard PS4, these wallpapers need a resolution of 1920 x 1920 pixels, and the PS4 Pro requires 3840 x 2160. Insert the USB drive into your PlayStation console, wait a few moments, and then head to Settings > Themes > Select Theme > Custom > Select Image > USB Storage Device. Choose your picture from the drive, pick an accent color for the menus, and enjoy your custom wallpaper.
4. Plug in extra storage
Thanks to new updates this year, you can get more storage without having to swap out the console’s internal hard drive. The PlayStation 4 will now allow you to save games and apps on a standard external drive, as long as it can handle USB 3.0 and has a capacity between 250GB and 8TB. When you’ve found suitable hardware, plug it into your console. Open Settings > Devices > USB Storage Devices, select your drive, and hit Format as extended storage. The newly formatted drive will become the default place where the PS4 saves apps and game progress. You can change the default back to the console’s internal storage in Settings > Storage.
5. Double-tap to switch between games
Here’s a good trick for quickly jumping between games. On the DualShock controller, double-tap the PlayStation button to switch back to the previously-open app or game. This works with most, but not all, titles. However, it won’t function when you’re switching between two programs that both rely on an internet connection.
6. Improve older games (only on the PS4 Pro)
The shiny new PlayStation 4 Pro has extra horsepower to generate improved visuals at a higher frame rate. But this only works on newer games that have been optimized for this function. That’s where Boost Mode comes in. It can push some of the older, non-optimized games to higher frame rates more consistently. Turn it in Settings > System > Boost Mode. Sony itself admits that this mode’s results can vary. Still, if it starts causing problems as you play, you can always turn it off again.
7. Download content in Rest Mode
When you turn off your PS4, its internet connection cuts out too—which means any updates that were happening in the background must pause until you restart the console again. However, you can keep the internet link active by putting the console into a low-power Rest Mode rather than switching it off completely. To enable this mode, go to Settings > Power Saving Settings > Set Features Available in Rest Mode. In addition to having Rest Mode keep that web connection alive, you can tell it to keep providing power to its USB ports (to charge your controllers) and to suspend apps and games so you can quickly resume them when you bring the console back to life. Once you enable one or more of these features, then the next time you press and hold the PlayStation button to turn off the console, you’ll see options to either switch off the box or send it into Rest Mode.
8. Reconfigure your gamepad
Many PS4 games let you remap the controller buttons so you can set custom shortcuts. If a game doesn’t make this option available, then you can make similar adjustments through the console’s system settings. Head to Settings > Accessibility > Button Assignments > Enable Custom Button Assignments > Customize Button Assignments. On this screen, you can reconfigure the controller buttons. These customizations will apply within all games until you disable them again. However, they’re linked to the currently-active user account, so other users won’t have to reset the controller to get the default configuration back.
9. Shut up the notifications
PlayStation sends you notifications when friends come online or download patches become available. But sometimes, you just want to focus entirely on your game or video. On those occasions, you can suppress alerts in Settings > Notifications. On this screen, you can use the tick boxes to customize what you receive. You can choose to avoid notifications for trophies, invitations, and other events, or you can pick Disable Pop-Ups While Playing Video for an interrupted viewing experience. Or go ahead and switch off notifications altogether.
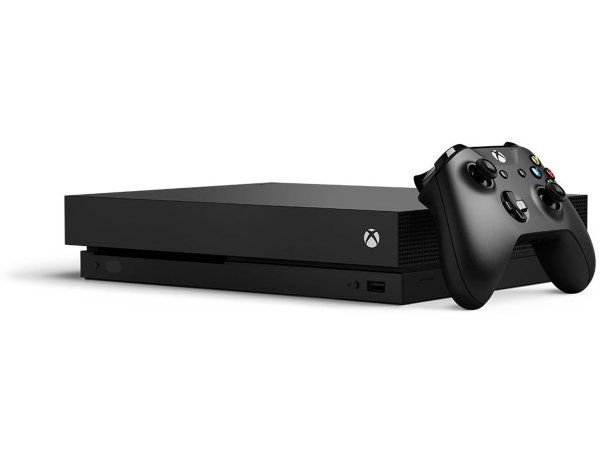
For Xbox One
1. Stream to a Windows 10 PC
Microsoft develops both Windows 10 and the Xbox One, so the tech company makes it fairly easy to stream games from the latter to the former. First, connect your console and your computer to the same wireless network. Then turn on your Xbox and head to Settings > Preferences > Xbox app connections. Under This Xbox, enable Allow game streaming to other devices, and under Other devices, enable Allow connections from any device. Next, grab your laptop or desktop, click the taskbar to search for “Xbox,” and launch the computer’s Xbox app. On the left side of the screen, click Connect and then select your Xbox when it appears. Now you can launch one of your games and stream away.
2. Reconfigure your controller
This trick, which we’ve covered with the PS4 DualShock controllers, also works with the Xbox One. From the front screen, go to My Games and Apps > Apps > Xbox Accessories. Here, you’ll see connected controllers on screen. To remap the buttons on any of them, select Configure > Button mapping. Although these changes will apply to all of your games, they won’t affect other user accounts.
3. Get new features in advance
The Xbox Insider Program lets you preview advanced versions of the Xbox One software. These versions may have a few more bugs than usual, but they give you the opportunity to access cool new features and settings before they officially roll out. Anyone can sign up for this free program, but it rewards longtime users: The longer you’re enrolled, the more types of preview software you’ll be able to try out. To get started, go to the Store tab, search for “Xbox Insider Hub”, and select Get/Install from that page. Once you’ve installed the app, open it and pick any preview from the Insider content section.
4. Plug in a keyboard
Given the Xbox One’s shared heritage with Windows, it’s no surprise that you can plug a wired keyboard into one of the console’s USB ports and start typing away. Although you can’t play games through this peripheral connection, it makes entering text and chatting much easier. Microsoft has also discussed giving games mouse and keyboard support . There’s nothing official on that front yet, but keep an eye out.
5. Talk to Cortana
Microsoft has recently added support for its digital assistant Cortana on the Xbox One. So if you prefer talking to your games console rather than tapping on a controller, grab a connected Kinect or a headset with a mic. Then say “hey Cortana” and issue a command. For example, say “hey Cortana, play [game title]” to launch any game, “hey Cortana, go home” to return the home screen, “hey Cortana, record that” to save the last 30 seconds of gameplay, and “hey Cortana, take a screenshot” to quickly capture a still image. Microsoft has a list of more Cortana commands for your Xbox One.
6. Trim your clips
Xbox One makes it simple to record videos of your gaming exploits: Just pick Capture from the in-game menu. That same menu lists recent recordings so you can easily share them to a platform of your choice. But you can also take more control over your captured clips with Microsoft’s editing software. From the Xbox dashboard, go to the Store section and install the free Upload Studio app. Once it’s up and running, select a stored clip and choose Edit. Then you can select Skin to add visuals on top, Trim to cut out sections of the clip, and Upload to share it with the wider world.
7. Disable movie autoplay
By default, when you slide a Blu-ray disc into your console, the movie starts playing. If you’ve watched part of the movie before, it will also resume from the last point you saw. This is handy if you’re ready to watch, but might become inconvenient if you just want to load a disc and then save it for later viewing. To stop Blu-rays from launching as soon as you insert them, head to Settings > Disc & Blu-ray and untick the box marked Play Disc Automatically. If you don’t like discs resuming from your last watched point, untick Resume Playback too.
8. Set up your Xbox to match your monitor
If you know the exact specs of the monitor you’re using, you can set the Xbox One’s resolution and refresh rate to get the best image possible. First, set the refresh rate to a rapid 120Hz in Settings > Display & sound > Video output > Refresh rate. Next, visit Settings > Display & sound > TV resolution and set a resolution of 1440p, a useful middle ground between 1080p and 4K. If this is what your monitor uses natively, it should result in a sharper picture.
9. Instantly cast movies to your Xbox
We opened with a tip on streaming from an Xbox One to a Windows 10 device, and you can send locally-stored video files in the opposite direction as well. Connect both devices to the same home network. Then, on your computer, open File Explorer and right-click on a video file. Select Cast to Device and choose your Xbox to stream that video to the console.
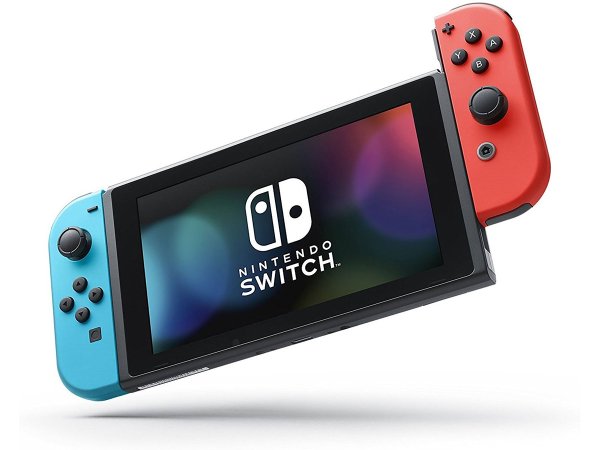
For Nintendo Switch
1. Take your screenshots with you
The Switch has a dedicated screenshot button that makes it easy to grab images of what you’re playing. What you might not know is that you can save these pictures to an inserted SD card. Compared to the Switch’s built-in sharing options, this is a simpler way to transfer files, particularly if you want to collect lots of pictures to share online, build a montage of screenshots, or edit the images on a desktop computer. To set it up, go to System Settings > Manage Save Data/Screenshots > Manage Screenshots > Save Location and change the location to your SD card. Then, once you’ve saved the images you need, pop out the card and slot it into your computer’s memory card reader.
2. See how long you spend gaming
Just how much time have you been hanging out with Mario, Zelda, and the rest of the gang? To track how long you’ve spent in each game, head to the home screen, select your avatar on the top left, and scroll down the Profile page to review your behavior. Choose the Friend List option on the left to snoop on your friends’ playing habits. These statistics will start showing up once you’ve been using your Switch for at least 10 days.
3. Set time limits for kids
We’ve already mentioned how you can keep track of your own gaming time, but Nintendo also helps you limit the time your kids spend on the Switch. For the full suite of controls, download the Nintendo Switch Parental Controls app (for Android and iOS). Sign in with your Nintendo credentials, and you can see what your kids are playing and for how long. The app can also shut down playtime remotely when children spend too much time glued to the screen. Based on age rating, it even sets limits on the games your kids are allowed to access.
4. Use Joy-Cons with other devices
This console connects with its Joy-Con controllers via standard Bluetooth. That means you can use your Switch controllers to steer Joy-Con-enabled games on other Bluetooth-enabled devices, whether they run on Windows, macOS, Android, or iOS. On the side where the Joy-Con meets the Switch, you’ll find a small black pairing button. Hit that button to sync the Joy-Con with your non-Switch device. When you slot the Joy-Con back into place on the Switch, it will reconnect automatically.
5. Invest in a Pro Controller
The Nintendo Pro Controller ($68 on Amazon) isn’t cheap, but it comes with a lot of perks. An embedded NFC chip-reader lets it interact with Nintendo’s Amiibo figures, bringing these real-world toys into your video; it supports motion controls, so your physical movements will affect the game; and it gives you haptic feedback through rumble support. As you use the more advanced controller, your Joy-Cons can stay linked to the Switch, where they’ll charge up until you’re ready to hit the road.
6. Automatically turn on your TV
When your Switch is docked and connected to a television, you’ll probably want to turn on the big screen at the same time as your console. To make sure this happens, go to the front screen and navigate to System Settings > TV Settings. Then turn Match TV Power State to On. Now turning on your Switch will activate your TV, and turning off the larger screen will shut down the console as well. To turn off this behavior, turn Match TV Power State back to Off. One caveat: Although most modern televisions will allow this setting, not all of them will—make sure they support a HDMI CEC connection.
7. Measure battery life more accurately
Want to know precisely how much juice is left in the tank? The Switch can display a percentage reading next to the standard battery icon in the top right corner of the screen. Head to System Settings > System > Console Battery % to make this information appear.
8. Extend the battery life
Nintendo built the Switch for portable, on-the-go play, which means it depends on a battery. To eke out as much play time as possible, you’ll want to try a few of these battery-saving tweaks. First, dim the brightness by tapping the Home button on the lower right, going to the quick-settings menu, and sliding down the brightness bar. In a pinch, activating airplane mode from that same quick-settings menu will disable the Switch’s Bluetooth and Wi-Fi, which both drain the battery life. Finally, if you’re prepared to spend some cash, invest in a USB-C portable power pack. You need something that has an output of 5V-3A or higher and that specifically mentions its compatibility with Switch, such as the Anker PowerCore+ 20100 ($66 on Amazon).
9. Find friends
In general, adding friends remains a convoluted process on the Switch. However, it’s become slightly easier since Nintendo added the ability to link your Facebook and Twitter accounts, allowing you to quickly scan your networks for Switch-owning friends. To do this, open your Profile page (select your avatar from the list in the top left corner of the screen), choose Friend Suggestions from the list on the left, and select either Facebook or Twitter. Follow the instructions to connect your accounts and find social-media friends to game with.


