
We may earn revenue from the products available on this page and participate in affiliate programs. Learn more ›
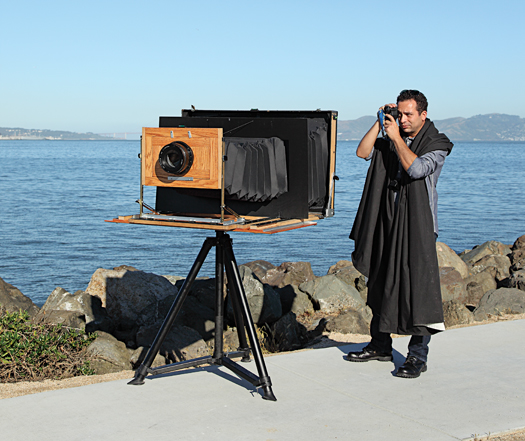
Darren Samuelson had just taken his last photo of Manhattan when the police arrived. He and his father had been working from an empty dock across the Hudson River, and the authorities wanted to know why they were pointing a five-foot-tall, six foot-long, 70-pound folding contraption at the city. Samuelson pleaded that it was a camera, and that he was just a tourist. His father, a retired sheriff’s department employee, talked the officers down, “and I got my shot,” Samuelson says—a photo so detailed that the print could be blown up to half the length of a volleyball court and still remain sharp.
A sushi chef and amateur photographer from San Francisco, Samuelson had been experimenting with large-format cameras for years, but the film was getting too pricey. He wanted to try cheaper x-ray film, and a friend who worked in radiology confirmed that it could work. The film stock Samuelson decided to use measured 14 inches by 36 inches, though, so the next challenge was to try to build a camera that could handle it. He began by constructing the massive accordion-like bellows he would need to manually adjust the camera’s focal length, spending two weeks on the floor folding, cutting, gluing, and inserting the ribs that would give it form. “Of course, it didn’t work,” he says of his first attempt. “I hadn’t measured correctly.”

The next day, he ordered more cloth and started the bellows again. This time he was successful, so he moved on to the frame, using a computer-aided design program to ensure that he got the measurements right. The camera and bellows unfold and slide out on rails, with a lens at one end and the film holder at the other. To focus, he slides either end in or out.
The result is not point-and-shoot, Samuelson admits, and the build wasn’t easy (the parts list runs to 186 rows on a spreadsheet). “But when I hold up a print and see the amazing detail,” he says, “I think, ‘Yeah, this was worth it.'”
How It Works
Time: 7 months
Cost: $1,800
FOCUS
Before inserting a sheet of x-ray film, Samuelson lines up his shot. The light floods in the front lens, through the dark bellows, and onto a plate of ground glass at the back. The frosted ground glass is needed to show what the shot will actually look like. Samuelson spent two days grinding transparent window glass with an aluminum oxide paste to get it right. When he finishes focusing a shot, he snaps on a lens cap and measures light levels.
SHOOTING
The film can’t be prematurely exposed to any light, so Samuelson built three large film holders. Custommade acrylic holders called dark slides also cover up each sheet of film. When he’s ready to shoot, he inserts one of the film holders into the camera and pulls out the dark slide, leaving the film ready for exposure. He designed the camera to work with two different lenses, which each require a different method of shooting. With the first, he pulls off the cap, counts off time on a stopwatch as light from the scene exposes the film, and then snaps the cap back on. The other lens includes a shutter-release cable. He sets the shutter speed and squeezes the cable to take the shot. Each of the three film holders contains two sheets, so he can take up to six shots of a given subject.

DEVELOPMENT
The x-ray film is extremely sensitive. To keep added light from leaking in after a shot, Samuelson reinserts the dark slide and then pulls the whole thing out. At home, he develops the black-andwhite prints in three custom-built trays, each of which uses an electric pump to suck out the chemical solution and return the chemicals to their containers. When PopSci caught up with him during his road trip over the summer, he was preparing for his first solo exhibit. “The minute I get home,” he said, “I have to start developing.”